February 8, 2010

Cat's Twilight Block of the Month

Our very own Cat has put together a wonderful Twilight themed Block of the Month quilt program.

You can find her patterns at Twilight Crafts on LiveJournal. A new pattern will be released the first weekend of every month and it will run for twelve months.

Cat says, It's a free BOM that will be having 2 lots of patterns each month; a beginners version for those new to the scene and an advanced version for the bravehearted.

Patterns will be posted on the Twilight Crafts site the first weekend of every month with 12 patterns in all. If you join in the group on the LiveJournal page then you can also go in the drawer for monthly prizes (see details at the site).

It would be great to have as many people as possible join in.

All patterns have been designed by myself and are provided free for personal or non-profit use.


Here is a sample of the first 2 patterns available:

Beginner's Block #1

Advanced Block #2

We've started a thread for it at TwilightMOMS as well.

February 5, 2010

Elizabeth's Mystery Quilt Challenge Update, Part IV

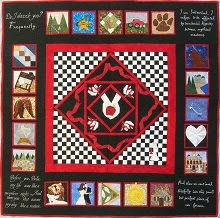
Since Christmas, and the crafting mayhem that accompanies it, has passed, my main project focus has been my Twilight Quilt. I started this project just over a year ago and it has been set aside so many times for other pressing projects. I have been collecting patterns and fabrics, filing away ideas for future use, dreaming, planning. And I finally get to put all that to use. The only problem I have now with this quilt is deciding which block to work on next. I have filled six empty spaces since the beginning of 2010. And I'm working on filling the seventh. I've started my own blog to catalog and keep track of my crafty things. As I finish each block I've posted the details while they're fresh in my mind. But I wanted to share an update here as well.

First, my quilt is no longer called the Mystery Quilt. I've pretty much hammered out all the details and I realized one day that due to the insane amount of work that I'm putting into not just one quilt, but two identical Twilight quilts, that the quilts must be called, More Than A Little Obsessed. "Why," you might ask, am I making two identical Twilight quilts? There are a couple of reasons. My quilt started out as a 'snuggle-under-it-and-read' kind of quilt. I was following the Block of the Fortnight Mystery Quilt instructions on the Zeppelin Threads web-site. I'd bought enough fabric for two quilts and intended to make one for Stephenie Meyer and one for myself. When there was a pause in the release of the instructions for the Mystery Quilt, plans began to emerge for a group quilt for Stephenie (now know as Piece, Love, Twilight) and it seemed to me that a sending a quilt to Stephenie from just me was no longer the thing to do.

Still, I'd started two quilts and so I decided to finish two, mainly because I'd bought enough of a very expensive black Civil War reproduction fabric for two quilt backs. I'm beginning to think that was a little neurotic. Plans for my own quilt began to evolve at this time. But by the time I realized that I was going to be spending an obscene amount of time on each block and that my quilt had expanded and morphed into something that no one would ever use for such a casual purpose as snuggling under to read, it was already too late. I was already in too deep with my 'twin' quilts to give it up. I'd spent too much time on the few blocks I'd completed to abandon one set and make just one quilt. There was only one thing to do, keep on keepin' on.

Before I realized the intense amount of time each block would take, I didn't think to keep track of the hours I was spending on this quilt. Once I realized that is was taking hours and hours for each block, I just had to turn a blind eye. I couldn't bear to think of how much time it was taking. So, I think that the name More Than A Little Obsessed is very fitting for these identical quilts. And anyone who has read Twilight should understand the meaning.

Now the question is, 'what to do with the second quilt?' I plan to add a room onto my house for the first quilt and build a shrine to it. The second quilt will probably be locked away in some earthquake-proof, fire-proof, flood-proof, impervious-to-natural-disasters safe placed on the dark side of the moon.

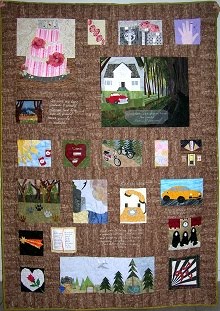
Now on to sew-and-tell with the last six blocks I've completed and a preview of the seventh. This is I Am Switzerland and belongs in the Eclipse section of my quilt. This is Cat's design and I was lucky enough to be her pattern tester. Thank you, Cat, for sharing your wonderful talents! The red fabric is the same that I used in the sashing and borders of the Stephenie Meyer quilt, almost the last bit of it. And the black is my ever faithful and trusty Civil War reproduction fabric, which will also be the quilt back.

This is the My Jacob block, representing the 'Jacob' who is Bella's friend. Another Cat original, the Paw Print pattern is available at SewHooked. Adding the claws was Iris' idea. Thanks for the inspiration!

I wanted something spectacular for the Meteor. You know, the meteor Edward compares Bella to in New Moon. I think that this fits the bill. I used The Night Sky pattern by Marcia Hohn. Two words for this block? Fairy Frost! I used Gold, Yellow and Banana.

How strongly are you opposed to grand theft auto? Alice's Porsche was fun to put together. This is also Cat's design.

Bella's Truck was among the first patterns I collected for my quilt (and another of Cat's designs). I'd been itching to try it out for months. It was so satisfying to finish and fit into my electronic layout.

I worked on Charlie's House in two sections. It technically takes up two blocks, although the blocks aren't separated by sashing. I started out with the forest* while I mulled over which fabrics to use for the House, which turned out to be a surprise to me, mostly because I wasn't sure what color to make Charlie's house. The books don't say (trust me, I've looked). Charlie's house in the movie is white. The Cullen's house is white, but in the movie, it is tan. This presented a problem because I wanted to stay true to the books in the representation of the Cullen's house and the only image of Charlie's house was white, and I couldn't have two white houses. So, after talking it over with the other coven members, I went with a light tan. I like the results.

I'm currently working on a section across the bottom of the quilt that has the Cullen's house, the river, a bit of forest* and Bella & Edward's Cottage. Here is this section in progress. This takes up a little less than half of the section this block will fill when complete. The river, more forest* and The Cullen's house goes to the left of this completed section.

*Key: 1 paper pieced tree = 500 trees in the Fork Forest

February 3, 2010

Paper Piecing Tutorial

I don't know if I like to paper piece, but I do like the results you get from paper piecing. Paper piecing is time consuming. And sometimes a little frustrating. But the cool things you can create in fabric from paper piecing patterns are amazing. As I've worked on group quilts with the Twilight Quilters Coven and my own Twilight quilt, I've honed my skills as a paper piecer. I think I'm slower than ever, but hopefully I can put together some instructions that will be helpful for beginners or those who have only done basic paper piecing.

Paper Options:
There are many options for how you prepare your pattern. The obvious choice is foundation paper. It is nice and stable to work with while piecing, but does not tear away after you've finished your project. Some foundation papers must be trimmed away. The foundation paper I linked to washes away, but is a little expensive at $1.20 a sheet. You can also use newsprint (blank, obviously, available in rolls at a local newspaper office). The advantage of using this is ease in removal after you've finished piecing. The disadvantage is that it tears easily and may be difficult to copy or print on. Copy paper works well, but is a little thick. The lowest weight I've seen in stores is 20 lb. paper. If you can find a lighter weight, that is best. Recycled paper, even at the 20 lb. weight seems to be a little lighter than regular paper, so I try to use that when using copy paper.

My personal recommendation is vellum paper (17 lb. weight). There are several weights of vellum available, so make sure to go with the lightest you can find. Avoid vellum card stock. There are several advantages to using vellum paper. You can print or copy on it easily. Many craft stores and copy shops carry it, making it readily available. You can see through it. It is thin but strong, so it doesn't tear accidentally, but will tear away easily when you've finished your project.

Pattern Sizing:
You may find a pattern that you love but it is the wrong size for your quilt. You can adjust the size of your pattern by dividing the size you want your pattern to be by the size that it is and then multiply by 100 to get the percentage.

For example, if you want your pattern to be 4" and it is 5" you divide 4 by 5 and get a decimal of .8. Multiply the decimal by 100 and you will get the percentage that you need to reduce it. In this case you would reduce the pattern to 80%.

Using the same 5" pattern, but enlarging it to 6" means that you divide 6 by 5 and get a decimal of 1.2. Multiply it by 100 and you will get the 120%. In this case, you enlarge the pattern to 120%.

Supplies:
  • Rotary Cutter
  • Ruler with ⅛" markings (I like the 4" x 8" Omnigrid)
  • Small Cutting Mat ( 6" x 8" to 9" x 11" is about the right size to keep next to your sewing machine)
  • Spray Starch (I like Faultless Magic Sizing)
  • Dry Iron
  • Scratch Paper
  • Portable ironing board (if you are buying new tools for this, may I recommend this portable cutting/pressing station which has one side for pressing and one side for cutting and folds up for transport and storage)
  • Neutral colored thread
Let's Get Started:
Once you have your supplies assembled and your pattern ready you can get started. Some patterns are marked with a seam allowance around the pattern. I completely ignore this and add my own seam allowance plus a little cushion for error.

Use your rotary cutter (yes, I said rotary cutter) to cut your pattern pieces out (paper dulls cutting tools as we all know, so you may want to keep separate blades, one for "paper piecing only" and one for "fabric only"). When cutting the pattern pieces, add ⅜" around all inside seams, that is, all seams that connect with another piece in the block. The notes I put on some of the pictures are a little hard to read at this size, so click on any picture for a closer look (right click to open in a new tab).

Add ½" around the outside edges of the block.

The reason for adding a bigger seam allowance than you need is because fabric doesn't always behave the way it is supposed to, so you want a cushion to work with, just in case.

Here is the pattern all cut and ready to go. We're working with Cat's design for the New Moon Cover, which will be available soon. The pattern is the back side of your finished block. What you see on the pattern will be the reverse of your finished block.


Prepare your fabric by cutting it into strips. The strips should be wide enough to extend beyond the widest piece required for that color. Using spray starch and steam, press your fabric strips. This is important in a neat finished product.


Paper piecing is like paint-by-numbers, only with fabric. The pattern will indicate which color of fabric to use in each numbered section. Because I enlarged this pattern, it is all in black and white, so I kept a copy of the colored original close by to make sure I was using the right color in each section. Some patterns will write out the color to be used rather than coloring in that section.

Following the key on the pattern for sewing order, begin piecing the first section indicated. Cut a piece of fabric in the corresponding color from your prepared fabric strips large enough to completely fill in section 1 (the area inside the dotted red lines). Don't try to cut an exact piece. Work with pieces of fabric that fill the area plus seam allowance. The wrong side of the fabric should be against the wrong side of the pattern. If you flip the pattern and fabric over, you should be looking at the right side of the fabric. You can pin your fabric into place on the paper side of the pattern if you want to.


Place the fabric that will cover section 2 right sides together with the fabric for section 1. The majority of fabric 2 should be on the side of section 1. We are moving from section 1 to section 2, so when the fabric is turned from section 1, the right side will show and it will cover section 2.


Slightly reduce your stitch length. My default stitch length is 2.5 and I reduce it to 2.0. Place your pattern and fabric pattern side up and sew on the line between section 1 and section 2, beginning about ½" before the stitching line begins (or intersects with another seam line) and extending about ½" beyond the end of the stitching line (or intersection with another seam line -- in this case, all the way out to the edge of the pattern). Be sure to backstitch at the beginning and the end of your seam. This will help prevent your stitching from being pulled out when removing the paper later.


With the pattern facing up and the fabric laying flat, fold section 2 of the pattern back onto section 1 along the seam line.


Place your ruler along the seam and cut away the excess fabric in the seam allowance. On this particular pattern I am cutting at ⅛", which is half the normal seam. This pattern has many small and overlapping pieces and so I am using a smaller seam allowance to reduce bulk. On less complex patterns, a ¼" seams works just fine.


Unfold the pattern and open the fabric out so that right sides are showing and the seam is under the fabric. Place the pattern on a piece of scratch paper (the ink of the pattern will transfer when heated and you don't want it on your ironing board cover to transfer to other fabrics later) and press with a dry iron (steam makes the paper curl, well worse that just a dry iron). Make sure to only press on the fabric side of your piece and not on the printed side of the pattern.

*Note: If you have used starch on your fabric and you are turning a small piece you can finger press here instead of using an iron.

Pull the paper away from the stitching in the area beyond the stitching line. This helps to get a clean seam allowance around each section added to the piece. Also, most of the backstitching will be trimmed away as you work, so by pulling away the paper while the backstitching is still there you will avoid pulling out the seams when removing the paper after the block is completed.


Place a strip of fabric that will cover section 3 right sides together with sections one and two. Stitch along the seam line between sections 2 and 3, extending at least ½" beyond the beginning and end of the seam line (where the seam line intersects with another seam line).


With the pattern side up, fold section 3 back onto sections 1 and 2 along the seam line as you did with the first seam. Trim the excess seam allowance away (as before). Fold the pattern back into place, open out the fabric and press. Remember to pull away the pattern from the seam at both ends of the seam line.


At this point your pattern is starting to take shape in the center, but still looks like kind of a blob around the edges. Don't worry! We'll get there. Continue adding sections to your block until every number has been filled in with fabric. This pattern has 4 sections. This is what it looks like from the back (pattern side) after it has been stitched, trimmed, pressed and the pattern has been pulled away beyond the seam lines. If you have been finger pressing as you work, make sure to press the whole piece with a dry iron now.


We're ready to cut this piece to shape now. Trim inside seam allowances to ¼".


Leave a ½" seam allowance on the outside edges of the pattern. This is the back of the piece.


This is what it looks like from the front.

Continue assembling pieces as directed by the pattern. The instructions for this pattern read:
AB > CD > E
FG > H > I
ABCDE > FGHI

Translation:
Row 1: assemble pieces A and B and sew them together; assemble sections C and D and sew them together and then sew joined sections AB to joined sections CD; assemble section E and add it to joined sections ABCD. Set the joined sections ABCDE aside.
Row 2: assemble sections F and G and sew them together; assemble section H and sew it to joined sections FG; assemble section I and sew it to joined sections FGH.
Row 3: Sew joined sections ABCDE to joined sections FGHI.

When it comes time to join two sections together determine the most important points in the two sections to match each other. In sections A and B it is most important that the two stem sections in the middle of the pieces match.


To help get the points to match up, insert a pin from the back (pattern side) through the center of the intersection where the points should meet on one pattern piece. Put the second pattern piece, right side together on top of the first and insert the pin through the top pattern from fabric side out through the pattern paper. Begin stitching with the pin still in (it should stick straight up through both pieces). Remove the pin and continue stitch along the seam line, backstitching at the beginning and end of the seam.


Remove the paper from the seam allowance on both sides of the seam and in about the width of the seam allowance on the side that you turn the seam to. This helps with removal later. After the paper has been removed, press the joined sections.


As I mentioned earlier, sometimes fabric doesn't behave as it should. When you lay the pattern out before assembly, all the pieces match up. But when you add fabric, sometimes you get unexpected results. That's why it is important to build in a little wiggle room when preparing your pieces. Since we left a ½" seam allowance around the outside of the block, there is a bit of extra fabric to work with and there shouldn't be a problem with the outside edges not matching in the top corner


Repeat the above steps for individual section completion and joining of sections as necessary to complete your pattern. This is the finished block before the extra fabric in the seam allowance has been trimmed away. By leaving a ½" seam allowance all around the edge of the entire block it gives an extra ½" to work with when centering and trimming your block.


There are two schools of though as to when to remove the paper from your block. Some quilters prefer to leave the paper in until after sashing has been added to the block. The paper gives the block stability and keeps the bias pieces on more complex patterns from stretching when you put it into place in your quilt. Some quilters like to remove the paper now after piecing is complete. I've tried it both ways and prefer to remove the paper at this point (*see below). The reason I use starch, apart from getting a neater finished result, is that it helps to stabilize the bias in the fabric. I suggest that you try both ways and find the method that suits you best.

This is the back of the block. Trimming the seams as each piece is assembled helps keep the back neat and reduces bulk in the block. I left the paper in the falling petal at the bottom of the block because I wanted to use the outer seam line as reference for where to trim the block.


Before trimming, give the block a good pressing with steam and if necessary, more starch. Again, the starch is to help stabilize the the different biases in the fabric.

There are several options for how to square up your block. The easiest way is to use a square ruler the size of your block (plus a ¼" seam allowance all the way around). Center the ruler over the block (right side up) and using the grid in the ruler to make sure the design is straight, trim away the excess fabric.

*If your pattern is fairly simple (only a few pieces per section and only two or three sections to join overall) and lays nice and flat with the paper still in, you can use the outer seam lines and the grid on your ruler and/or cutting mat to square up (remembering to leave a ¼" seam allowance on all four sides).

In squaring up this block, I used a landmark on the block as a reference. As I mentioned, I left the paper in the falling petal at the bottom because I wanted the seam to cut off as the pattern indicated. I used the grid on my ruler and on my cutting mat, as well as the line on the pattern to decide where to trim this block up, remembering to leave a ¼" seam allowance all the way around.

Here is the finished block. The camera bends the image a little, but trust me, this was nice and square when I put it into place.


A word about unpicking:
If you by some chance make a mistake, you don't have to throw out your whole section -- you can unpick paper piecing. Make sure to pull the stitches out from the fabric side so you don't tear your paper. Once you get the stitches out, you'll be ready to give it another try.

Paper Piecing Pattern Resources:
SewHooked by Jennifer Ofenstein (a Coven Favorite)
The Quilter's Cache by Marcia Hohn
Paper Panache
Piece by Number Etsy Shop
Silver Linings Originals by Linda Hibbert

February 2, 2010

Vampire Instructions

Shared by Iris.

TQC Exchange: Iris got some love from Elizabeth

From Iris on January 17:

Coming at a great time to cheer me up from a "down" weekend, this afternoon I opened the mail to find a surprise from my secret exchange buddy! It's a 5" x 7" matte print of this beautiful sketch of Robert Pattinson by Noel Cruz. Thanks secret buddy! I heart you. I'll update this post when I find out who sent it!

Update: Elizabeth was my xchange buddy! Look at the beautiful "Abbey Bag" pincushion/scrap bag she made me! She'd sent me the pattern but let's face it I was never going to get around to making it! This is perfect! And a selection of green fabrics. She knows I love green! Also the little rascal sent along a frame for that gorgeous print of the Robert Pattinson sketch! I had been thinking about getting a large frame and putting a printout of the original photo next to the sketch....now I have a better idea since I already got a frame, I'll just print out the original small and put it on the lower right corner! I heart you Elizabeth! Thanks for the great goodies!

TQC Exchange: Joyce's Gift from Iris

From Joyce on January 19:

I got a package today!!!!!!!! Iris, Thank you so much!!!! She sent some Steam-a-Seam 2, a white disappearing ink pen (which I actually desperately needed), a sweet note, and Twilight Candleholders and candles. She used each book cover and a fun quote to decorate the votive holders, and each candle scent represents something TS related (Edward, Bella, Forks, and Isle Esme). It's too bad we don't have scratch and sniff posts! They smell delicious!


TQC Exchange: Cat's gift from Joyce

Posted by Cat on January 28:

Last night I went to the post office and guess what finally was there waiting for me?

So excited!!! I recieved some lovely goodies from Joyce. Some lovely booties with a traditional quilt pattern design cross stitched into them, a love hand towel with cross stitch details, and some red and black quilting fabric plus some musical note fabric. I love them - thanks so much for that!!!

TQC Exchange: Wanda's gift from Cat

Related by Wanda on January 20:

It's here! My secret exchange gift is here and it is FUN AND FABULOUS, ABSOLUTELY WONDERFUL! Okay, let me just say thank you right off the bat to Cat for my wonderful box of goodies! Okay first off, the weather was so bad that I put off going to the mail box today and even thought I might just let Pere de Mer get it when he came home, but the rain let up and I decided the fresh air would do me good. And I got more than fresh air! Of course, I saw the country of origin right away and practically ran back to the house so I could get the box open! I love packages in the mail! Love to send them and love to get them! Cat wrote me a lovely card with of course the varigated tulip on the front, and then there was some sparkly Edward fabric!!!!!!!!!!!!! I just today told my daughter that when she goes to Mary Jo's again that I will need a little more of that white sparkle fabric. Thank you! The next thing I unwrapped was a Twilight pin and matching earrings. They are made of buttons! Really cute. The earrings are apples! And then there is a choker with the Cullen Crest and a stretchy bracelet with a crystal heart for Edward and a disc that looks like Jacob's tattoo! Cat, the bracelet fits perfectly! And all of these were in little star drawstring bags. And there are Australian landscape cards. I love them. I'm crazy about jewelry and stationery! Last year I got an upright furniture style jewelry box where I can lay everything out and just open and decide as I get dressed. I think I will devote one of the empty drawers to just my Twilight jewels! Oh almost forgot and there was a key ring that says I [heart] Twilight. Thank you so much Cat. I love it all. I am very touched with the handmade things. Really fun and well done! Thank you so much! I'm spoiled.


I set up my treasures from Cat on the fabric she sent and in the upper right corner is the card and underneath is a stack of cards she gave also! You can see the key chain too and the cute little star bags she put everything in!

A note from Cat on how she created the Quileutte bead.
I managed to find some plain flat wooden beads ages ago. To make them, I just coloured the background and using PVA glue, stuck on a [computer] printout of the tattoo. It took a while to get [the printout] at the right size! I then put a seal over the whole lot and voilá! A Quiluette Wolf Pack bead is born!

TQC Exchange: Mel's gift from Wanda

Reported by Mel on January 23:

SQUEAL OF JOY!!! I received my exchange package on Friday from my not-so-secret-anymore buddy MAMA WANDA! Here's what it was:

A gorgeous handmade Twilighty purse, which I am using to stash my take-along crafts (so far, knitting needles and yarn and x-stitching floss). It looks smaller than it is; inside it's huge! And I love it!!! So I open the package up and find all sortsa goodies, including these very fab Edward and Jacob New Moon pens. They came in a gorgeous case too! And, "after shopping mints" which are so cute. (I ate a third of the pack already...but then again, I DID go grocery shopping...) I got a FQ of beautiful green Fairy Frost. It's so pretty, I'm afraid of cutting it up! And a really pretty orange-and-gold fabric, which will be so pretty as the fairy's hair on DD's quilt! Lets see... oh yeah! And I saw a box of chocolates...or so I though! It's a chocolate calendar, with diffferent facts about chocolate every day! So fun!!!!!! There was also a yummy rosy all organic lip gloss that tastes like berries. And last but not least, tied to the strap of the beautiful purse, a bracelet!!!! I thought at first it was a Jacob-Edward bracelet, but upon closer inspection, it's ALL EDWARD!!!! There's a lion, the Cullen's crest, and an E charm on it. It was all beautifully wrapped in polka dot paper with a black velour ribbon. (I took a picture of it wrapped, but erased it by mistake.)

The image is a bit fuzzy... You can see the green fabirc to the left and the orange on to the right under the purse. (which is so fab!!! I can't believe Wanda made this for me!!!) I also put the little cards Wanda wrote by hand for me (that would be the red cards).

Close up of my awesome goodies!

This is self-taken picture of my otherwise normal right wrist, enhanced and made beautiful by the Edward bracelet.

THANK YOU WANDA!!!!